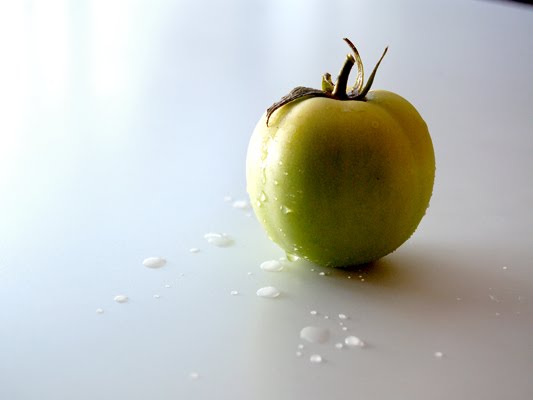
Fried green tomatoes have always intrigued me, along with deep fried pickles (which I will leave for another post). Strangely, up until now I have never tasted them – let alone cook them myself. So when I got the opportunity to grab some fresh green tomatoes from Sandy’s vegetable garden up north, I jumped at the chance. I had never been so happy going home in the car with a bucket full of tomatoes, basil, and zucchini blossoms – all the things I cannot wait to grow in my own yard one day. You see, I currently live in an apartment that lacks not only a balcony, but even so much as a window sill. Needless to say, that dream will have to be put on hold until I move out.

Lastly, I would just like to mention that I am lucky enough to be going on a trip to Florida tomorrow with Mike and my family! I hope to be returning with some more wonderful pictures and possibly a few food stories as well. So this will be my last post until I am back, see you in a week and a half!
This weekend we drove up north to visit with Mike’s family and to celebrate our birthdays. It was a great weekend – with even greater food. His mom’s baking is out of this world – so clearly, I had to feast on my favourite peach pie, raspberry birthday cake, and pull-apart cinnamon buns. I was weak and ate multiple servings of each (not the time to be worried about counting calories). Furthermore, to my surprise I received the neatest birthday gift – a handmade apron with my website on it!! I thought you guys would like to check it out so I posted a little picture. A big thank-you to Sandy and Bob for making it, and of course Alex for having to try it on so many times to make sure it fit just right.
So now that I am more appropriately decked out for the kitchen, let’s get cooking.
Now I know this recipe might not be the first thing you would want to make during the heat of summer, so why not save it for a couple months? I was aiming to use up the various produce I purchased at the farmer’s market – and to be honest, sometimes I just crave a good soup. Or is this a stew? Stoup? I turned out thicker than expected.
The original idea to do a soup came from a Mario Batali recipe, posted on the Food Network. Although, ultimately this soup became a huge departure from the original – I thought I would still post his for reference. You can really use any ingredients you have on hand and change up the vegetables if you like. Just don’t forget the leeks – they add a great flavour and I just love using them in soups. Lastly, top it off with a big drizzle of basil oil and shavings of fresh parmesan to kick things up a bit.
Vegetable Barley Stew:
Note: This could easily be made vegan by replacing the butter and parmesan with alternative ingredients. Also this recipe could be halved, as it does make a large pot. Remember to use what you have on hand.
2 Tbsp extra virgin olive oil
1 T butter
1 cup onion, diced
2 celery stalks, diced
2 leeks, quartered length-wise, sliced, and soaked in the sink to remove any sand
¾ cup pearled barley, rinsed
2 cups barlotti beans (Roman beans)
3 T tomato paste
Kosher salt
Pepper
8 cups vegetable broth (preferably homemade, or a good quality organic store bought version)
1 ½ cups potatoes, diced
2 carrots, diced
1 cup zucchini, diced
1 cup frozen peas
Basil Oil:
1 cup basil
1 large clove of garlic, finely chopped
¼ cup olive oil
Parmesan cheese
Heat the oil and butter on high in a large pot. Add your onion, celery, and leeks. They will give off quite a bit of water, so keep the heat high and stir until golden. Stir in the tomato paste, beans, and barley. Season to your taste with salt and pepper, and add the vegetable broth. Bring to a boil and lower the heat until simmering, for 30 minutes.
In the meantime, toss the basil and garlic in a food processor and slowly add the oil. The goal is to form almost a pesto-like consistency (you may or may not need more olive oil), and set aside.
Add the potatoes, peas and carrots to the pot and simmer again for 20 minutes or until just almost tender. In the last 10 minutes toss in your zucchini, and add more broth or water if the soup is getting too dry.
Serve with nice drizzles of basil oil and big shavings of parmesan.
Most people may not have quite the obsession that I have with pickles, I could easily eat a whole jar in one sitting. From a very young age, I continually rated the quality of pickles at every restaurant or fast food chain that served them. In fact, I think I still do – I am just in denial.
Recently, I have been delving into the world of canning and preserving. One of the first things on my list was to make homemade pickles – and really you can pickle almost anything these days.
I often visit a great Italian restaurant called Ritorno, located in Oakville. Ironically, the manager (not sure if she is the owner) is from North Bay and went to school here for hospitality – small world. Their food is spectacular, and my dad and I always share their antipasto platter for two. This plate is littered with fresh breads, cheeses, meats, and various pickled veggies – you can check out their menu here. My dad dives right into the meat and cheese, while I basically inhale every pickled or marinated vegetable as quickly as I can. My recent favourite, and one that I have grown to crave, are their pickled red onions. They are so tart – I mean scrunch your face up, eye-watering, tart (in a good way).

Oh yes, I did it again – another sweet recipe. Sometimes I just cannot resist. This time my goal was to make my first biscotti with whole grain flours and less refined sugars. That incorporates some healthy aspects, right? Maybe – but not after I decided to dunk them in white chocolate. Yes, you heard that correctly. Delish!
I remember going to cafes when I was younger, before I had ever experienced my first cup of coffee, and staring at the glass canisters full of biscotti. Never did I have any urge to try this crunchy cookie - until recent years.
I first experimented with a recipe that was going to be my basis for the biscotti and it turned out terribly. The ratio of dry to wet ingredients was way off and it was very frustrating. So I decided to jot down a few notes, and create my own version. Ultimately, I was impressed with the way everything turned out. They are perfect to eat on their own, or even better – dunking them in a hot drink. The white chocolate tastes great as it melts and infuses a warm cup of coffee. More notably, the underlying citrus flavour might give you an excuse to munch on one for breakfast – but I didn’t just advise that.

For this recipe, I used a mixture of whole wheat flour and all-purpose flour. I would have much rather used a whole wheat pastry flour, in replacement of the all-purpose, but was unable to find it in the northern grocery stores at the time. A combination of the two flours is essential or you will end up with very dense biscotti. In addition, natural cane sugar was used rather than a refined white sugar. So give these Italian double-baked cookies a try, it might be a great recipe to try for the fall – I was just too excited to wait that long.
White Chocolate Dipped Cranberry Almond Biscotti:
1 2/3 cup whole wheat flour
1 2/3 cup all-purpose flour (or whole wheat pastry flour)
¾ cup all-natural cane sugar
1 Tbsp baking powder
Pinch of salt
1 cup almonds, coarsely chopped
½ cup dried cranberries, roughly chopped
1 Tbsp orange zest
3 large eggs
½ cup olive oil
¼ cup fresh orange juice
Glaze:
1 egg, beaten
¼ cup all-natural cane sugar
340 g good quality white chocolate (optional, but you won’t regret it)
Preheat your oven to 325F and line a baking sheet with parchment paper.
In a large bowl, combine whole wheat flour, all-purpose flour, cane sugar, baking powder, salt, almonds, cranberries, and zest.
Whisk together the eggs and olive oil by hand. Gradually stir in the orange juice until combined.
Make a well in the center of your dry ingredients and slowly add your liquid mixture. Stir and form a dough. Note that the dough should be stiff, never gooey, and the flour should be combined.
Divide the dough into two loaves – you may need to flour your hands, although it should be fairly easy to work with. Flatten and shape the dough into approximately 4-5 inch wide and 9-10 inch long loaves (no need to be exact, the irregular shape can add some character).
Brush on the beaten egg, and sprinkle with sugar. Place the dough on the cookie sheet and bake for 25-30 minutes. The loaves should be golden in colour and just slightly firm to the touch (remember you will be baking them once more). Let them cool completely, this will help you slice the loaves.
Once cooled, cut into ½ inch slices. Again, this does not have to be perfect. Biscotti are traditionally this thin but if you prefer a heartier version that is fine too (mine varied). Place the cookies back on the baking sheet and bake for 10-15 minutes per side. You want them to be a golden brown (they will appear slightly darker due to the whole wheat flour) and fairly dried out (so they have a nice crunch and withstand some dipping in your coffee). Just remember that they tend to firm up even more while cooling once again.
After cooling the cookies for a second time, place a bowl over a pot of simmering water (never boiling water, you do not want to burn the chocolate). Also, make sure that your bowl does not touch the surface of the water. Then add the chocolate – I did this in batches, continuing to add more chocolate as I needed it. Stir until it is fully melted. You can either dunk half of the biscotti in the chocolate, or use a knife and spread the chocolate onto the cookie (this was much easier for me). Set the dipped cookies on a sheet of parchment paper and let the white chocolate completely cool until it hardens. Store them in an airtight container.
So, I must confess – I set the oven on fire the other night (and I mean on fire). What an ordeal, am I really meant to be in the kitchen if I am such a hazard? Anyways, it was a complete fluke accident and I will spare the embarrassing details. Thank goodness for baking soda. It just made me realize how streamline and smooth the cooking shows on television are in comparison to my own kitchen. Ultimately, nothing was ruined and no one was hurt. It has now become a laughable situation. Did I mention I wasn’t perfect? I think so.
Other than that my August long weekend was pretty good. I caught up with a few old friends and also made my first 100 percent whole-wheat chocolate chip cookies out of Good to the Grain: Baking with Whole-Grain Flours . They were excellent – a different earthy and nutty flavour paired with dark chocolate. You should give them a try if you are looking for a healthy twist on a traditional recipe.
For this next posting I thought you might like a main course. I decided to play off of Giada’s Sun-Dried Tomato Pesto recipe, but I wanted to lighten it by tossing in some sweet oven roasted tomatoes and fresh baby spinach.
Additionally, I added some kick to her pesto with a few red pepper flakes - I love the spice.
I felt that the sauce was fairly heavy with the strong taste of the sun-dried tomatoes that I did not need to add the parmesan - I just topped it with a few crumbles of goat cheese (a great pairing). It turned out wonderfully. So here is my version, and everything can be altered to your own tastes. If you are not a fan of sun-dried tomatoes, I am sure I have something up my sleeves for next time!
Sun-Dried Tomato Pesto Penne with Balsamic Roasted Tomatoes:
6 cups whole-wheat penne
1 cup of reserved cooking water
2 generous handfuls of sliced baby spinach
a few crumbles of goat cheese
Pesto:1 (270 mL) jar sun-dried tomatoes packed in olive oil
2 cloves of garlic
a few good pinches of red pepper flakes (to taste)
1 cup of fresh basil
Balsamic Roasted Tomatoes: *1 pint of small heirloom tomatoes
2 T olive oil
1 ½ T Balsamic vinegar
Kosher salt
Heat your oven to 350F. Cut the tomatoes in half, and place them on a baking sheet. Toss with the olive oil, balsamic vinegar, and turn them facing cut-side up. Sprinkle with a couple pinches of kosher salt. Roast them for approximately 45 minutes until they are tender, shrunken, and sweet.
* I would recommend doubling the ingredients for the roasted tomatoes if you are serving more people. We seemed to scoop these in our bowls faster than we anticipated.
Meanwhile, make the pesto by pulsing together the sun-dried tomatoes and their oil, garlic, red pepper flakes, basil, pepper to taste and if you wish a sprinkle of kosher salt. Blend until the tomatoes are finely chopped. Transfer to a bowl and set aside.
Cook the pasta in a large pot of boiling, salted water. Make sure you reserve 1 cup of the cooking water before draining.
In a large bowl, add your pesto (you may not need to use it all, depending on how strong of a flavour you prefer). Add the hot pasta, and toss thoroughly to coat. Slowly add some reserved cooking water just to moisten and thin the pesto out – not too much, it should still have a bit of bite to it. It is really a matter of preference here, so you can add more pesto or seasoning if want.
Lastly, toss in your sliced spinach – it will shrink down quickly in the hot pasta mixture. Top with your balsamic oven roasted tomatoes and a few crumbles of goat cheese.