Friday, August 20, 2010

Fried Green Tomatoes


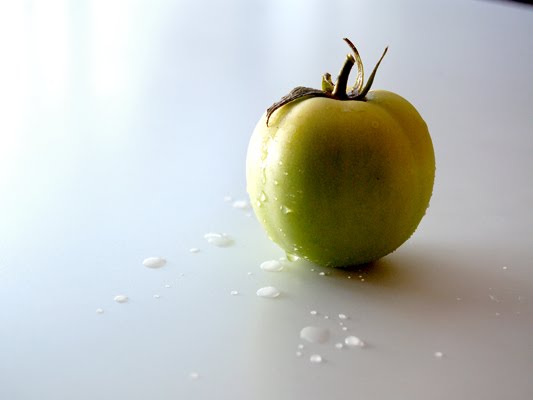
Fried green tomatoes have always intrigued me, along with deep fried pickles (which I will leave for another post). Strangely, up until now I have never tasted them – let alone cook them myself. So when I got the opportunity to grab some fresh green tomatoes from Sandy’s vegetable garden up north, I jumped at the chance. I had never been so happy going home in the car with a bucket full of tomatoes, basil, and zucchini blossoms – all the things I cannot wait to grow in my own yard one day. You see, I currently live in an apartment that lacks not only a balcony, but even so much as a window sill. Needless to say, that dream will have to be put on hold until I move out.


As I have mentioned before, this blog is about a learning process. So not having a clue where to start, I decided to use a recipe from the famous Guy Fieri – you know, the host of Diners, Drive-ins and Dives. I figured that if there was anyone who knew anything about fried food, it would be him. Therefore, I did not change a thing about his recipe. I thought I’d test his out first, and then dream up what I could possibly do next.

Essentially, you begin by slicing your tomatoes to about 3/8 of an inch. My mandolin does not make slices thick enough for this, so I sliced them by hand. This led to couple of uneven slices with varying thicknesses – but hey, that just adds to the homemade appeal. Next, you mix up some buttermilk and yogurt to dip the tomatoes in before you batter them.


Tip: If you do not have buttermilk on hand, you can easily mix your own! Buttermilk does not actually contain butter. Rather it is simply the left over, sour liquid from the butter-making process. All you need to do is add 1 cup of milk with 1 tablespoon of white vinegar – let it sit for 5 minutes, whisk it together and you’re finished.

I then quickly made the batter. Typically, they tend to consist of a combination of flour and cornmeal. Guy’s had some cayenne and pepper to kick up the spice – although, next time I would add more flavouring to this part of the recipe.


Heat up your oil to 365F. A neat trick I learned – since I do not own a thermometer yet (that is on the to-do list) – is to put a wooden spoon in the hot oil, and if it really bubbles around the edges, your oil is hot enough to fry. So drop in a few tomatoes at a time, and cook them a 2-3 minutes on each side. Next time I will wear a shield, as I only suffered minor burns from the hot oil. Hey – at least I didn’t set anything on fire this time.


Once they are fresh out of the fryer make sure to sprinkle them with some kosher salt. As for the dipping sauces, there are endless possibilities – ranging from cream sauces to marinara sauces.

The end result turned out pretty good! Once you bit into the perfectly crunchy outer layer, your palate was immediately hit with a blend of both sweetness and acidity. I loved the warm flavour from the deep frying, and it really amplified the fruity, sweet nature of the tomato. Overall, I think the batter needs some work – and next time I would really kick it up with a few more spices. Make sure to gobble these up right away as they don't keep.


Lastly, I would just like to mention that I am lucky enough to be going on a trip to Florida tomorrow with Mike and my family! I hope to be returning with some more wonderful pictures and possibly a few food stories as well. So this will be my last post until I am back, see you in a week and a half!

Thursday, August 19, 2010

Vegetable Barley Stew


This weekend we drove up north to visit with Mike’s family and to celebrate our birthdays. It was a great weekend – with even greater food. His mom’s baking is out of this world – so clearly, I had to feast on my favourite peach pie, raspberry birthday cake, and pull-apart cinnamon buns. I was weak and ate multiple servings of each (not the time to be worried about counting calories). Furthermore, to my surprise I received the neatest birthday gift – a handmade apron with my website on it!! I thought you guys would like to check it out so I posted a little picture. A big thank-you to Sandy and Bob for making it, and of course Alex for having to try it on so many times to make sure it fit just right.


So now that I am more appropriately decked out for the kitchen, let’s get cooking.

Now I know this recipe might not be the first thing you would want to make during the heat of summer, so why not save it for a couple months? I was aiming to use up the various produce I purchased at the farmer’s market – and to be honest, sometimes I just crave a good soup. Or is this a stew? Stoup? I turned out thicker than expected.


The original idea to do a soup came from a Mario Batali recipe, posted on the Food Network. Although, ultimately this soup became a huge departure from the original – I thought I would still post his for reference. You can really use any ingredients you have on hand and change up the vegetables if you like. Just don’t forget the leeks – they add a great flavour and I just love using them in soups. Lastly, top it off with a big drizzle of basil oil and shavings of fresh parmesan to kick things up a bit.

Vegetable Barley Stew:
Note: This could easily be made vegan by replacing the butter and parmesan with alternative ingredients. Also this recipe could be halved, as it does make a large pot. Remember to use what you have on hand.

2 Tbsp extra virgin olive oil
1 T butter
1 cup onion, diced
2 celery stalks, diced
2 leeks, quartered length-wise, sliced, and soaked in the sink to remove any sand
¾ cup pearled barley, rinsed
2 cups barlotti beans (Roman beans)
3 T tomato paste
Kosher salt
Pepper
8 cups vegetable broth (preferably homemade, or a good quality organic store bought version)
1 ½ cups potatoes, diced
2 carrots, diced
1 cup zucchini, diced
1 cup frozen peas

Basil Oil:
1 cup basil
1 large clove of garlic, finely chopped
¼ cup olive oil
Parmesan cheese

Heat the oil and butter on high in a large pot. Add your onion, celery, and leeks. They will give off quite a bit of water, so keep the heat high and stir until golden. Stir in the tomato paste, beans, and barley. Season to your taste with salt and pepper, and add the vegetable broth. Bring to a boil and lower the heat until simmering, for 30 minutes.

In the meantime, toss the basil and garlic in a food processor and slowly add the oil. The goal is to form almost a pesto-like consistency (you may or may not need more olive oil), and set aside.

Add the potatoes, peas and carrots to the pot and simmer again for 20 minutes or until just almost tender. In the last 10 minutes toss in your zucchini, and add more broth or water if the soup is getting too dry.

Serve with nice drizzles of basil oil and big shavings of parmesan.

Friday, August 13, 2010

Pickled Red Onions


Most people may not have quite the obsession that I have with pickles, I could easily eat a whole jar in one sitting. From a very young age, I continually rated the quality of pickles at every restaurant or fast food chain that served them. In fact, I think I still do – I am just in denial.

Recently, I have been delving into the world of canning and preserving. One of the first things on my list was to make homemade pickles – and really you can pickle almost anything these days.

I often visit a great Italian restaurant called Ritorno, located in Oakville. Ironically, the manager (not sure if she is the owner) is from North Bay and went to school here for hospitality – small world. Their food is spectacular, and my dad and I always share their antipasto platter for two. This plate is littered with fresh breads, cheeses, meats, and various pickled veggies – you can check out their menu here. My dad dives right into the meat and cheese, while I basically inhale every pickled or marinated vegetable as quickly as I can. My recent favourite, and one that I have grown to crave, are their pickled red onions. They are so tart – I mean scrunch your face up, eye-watering, tart (in a good way).


I decided to go on a hunt and see what was out there in the recipe world for these delectable pickled red onions. What I found, was that most recipes either were based on just straight vinegar or spiced vinegar. Immediately, the underlying notes of cloves, peppercorns, red chiles, bay leaves and cinnamon seemed most appealing to me. This would add a depth of flavour to the pickle and possible tame the tang? We’ll see.

After endless pondering, and a severe craving for vinegar, I decided on playing around with a recipe found on Orangette. This food blog is what all foodies aspire to become – definitely worth checking out.


I made a few changes, among them are varying the amounts of sugar and vinegar – Ritorno's pickles have what tastes like no sugar added, so I didn’t want them to be too sweet. You can simply play around with the flavours and test out what suits you best. Most people serve these with cheese, crackers and breads – but I picture them on a falafel sandwich and I’m in heaven. Better yet, eat them right out of the jar.

Pickled Red Onions:
Based on a recipe featured on Orangette, found here.

3 cups distilled white vinegar
½ cup natural cane sugar *
1 cinnamon stick, broken in half
4 whole cloves
5 allspice berries
1 red chile, broken in 4 (1 piece for each jar)
2 bay leaves
1 star anise
15 black peppercorns
1 ½ lbs red onions
2 cups water

In a medium stainless steel (non-reactive metal) pot, bring to a boil the vinegar, sugar, cinnamon stick, cloves, allspice berries, chile, bay leaves, star anise, and peppercorns.

Slice the onions fairly thin either by hand or on a mandolin. (A mandolin makes this much more efficient and provides more uniform slices – although it is not a necessity). Also note that you can vary the thickness of the onions depending on your preference (I prefer them thin because it is what I am most used to). Make sure to toss out the bruised or tough outer layers.

Once the brine has come to a boil, add the onions in batches. As soon as you do so, allow the brine to come to a simmer again and leave them in for 15-20 seconds. Stir them down with a wooden spoon. This quick cooking time is essential in retaining a crispy, crunchy onion – nobody likes a mushy pickle. They will immediately be a vibrant pink colour. Remove them and spread them out on a baking sheet to cool (you may need a few of them); this will speed up the cooling process. Continue to blanch all your onions in batches. Once you are finished, chill your brine in the fridge. In the meantime, sterilize your jars.

When everything is completely cooled, place the onions in the jars – I ended up using four 500 ml jars. Add the 2 cups of water to your brine mixture and stir to combine. Fill your jars with the brine and make sure the onions are completely covered. You may have a few extra onions – I just munched on them as I was canning.

I did not seal my jars, because I thought reheating them might compromise the crispy nature of the onions. Simply place them in the fridge and within 2-3 days they are ready to eat. They will keep for approximately one month.

* Note that I drastically reduced the amount of sugar, if you are looking for a sweeter pickle then feel free to adjust that to your liking. Make sure to taste your brine as you go. I also used natural cane sugar (less refined), but I have also seen this recipe done with the addition of honey – something to try in the future? Enjoy!